 Click here to visit this playlist @ Curso em Vídeo
The plan is to show you my progress in 3 phases:
- PHASE 1* - Is this you're reading: Only one long page focused in HTML5 / Aware of imperfect testings of CSS / No JavaScript. DONE = THIS PAGE HERE.
- PHASE 2 - The same content, forked and completely refactored, with
navigation bar and several pages showing how to apply the correct CSS3.
First deploy:DONE CLICK HERE AND TAKE A LOOK!. - PHASE 3 - Change of plans: restarting with JavaScript course. Check here.
THE COURSE STARTS HERE
HTML <!DOCTYPE html> Declaration
All HTML5 documents must start with a <!DOCTYPE html> declaration.
The declaration is not an HTML tag. It is an "information" to the browser about what document type to expect.
In HTML 5, the declaration is simple:
<!DOCTYPE html>
The 3 paragraphs above were taken from W3schools. It's worth a visit.
That's how an HTML5 document is born. Of course you have to save the document as "some_name".html. For instance, index.html.
Any other thing typed after !DOCTYPE than only html will not make an HTML5
document. It could build a previous and outdated html document (like html4) or nothing at all if it's an
invalid code.
But you don't have to type it all. Not in Visual Studio Code (VS Code) editor.
VS Code has a typing assistant called Emmet that sort of guesses what you are about to type and gives you hints to choose.
Thus, just type ! in a blank HTML document. The figure of a tool followed by any
options of ! Emmet may have wil instantly appear in a blue background near to your cursor, like
that:
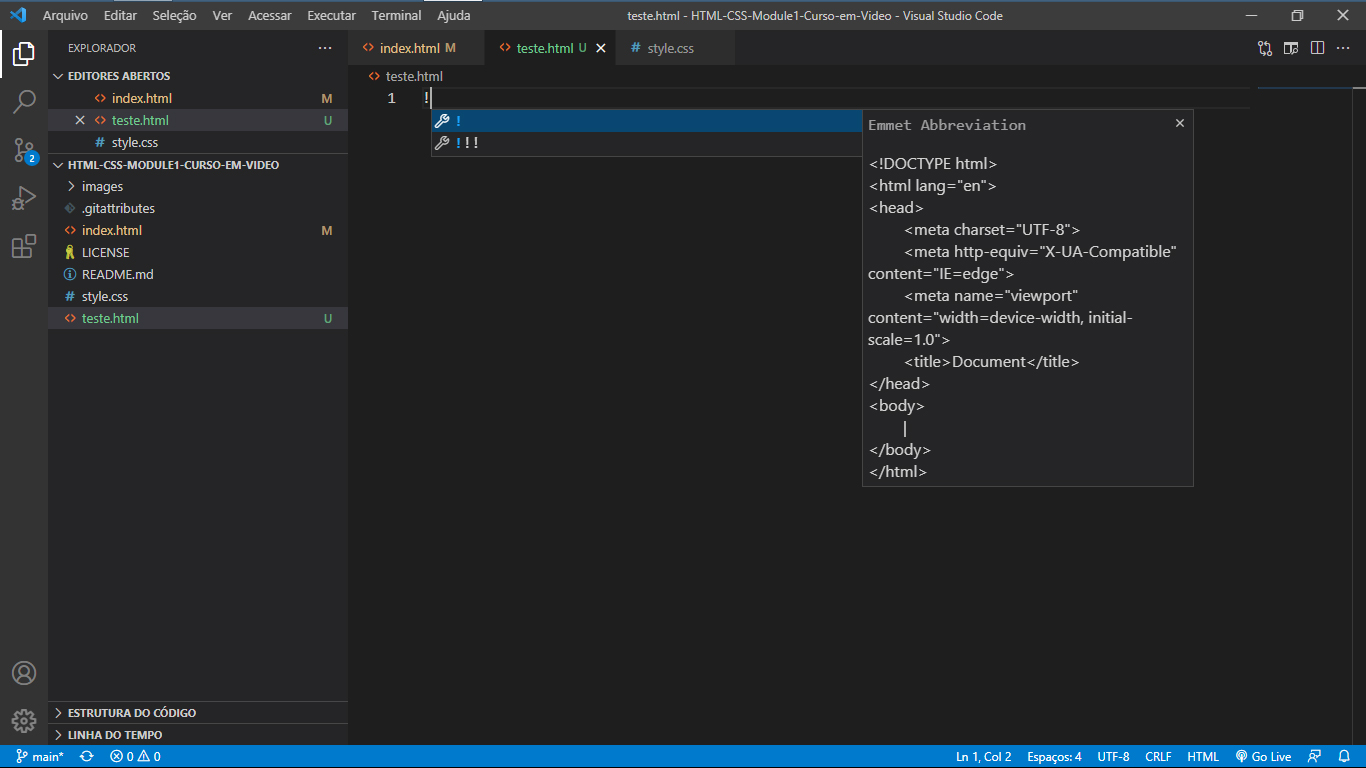
Then, press Enter and it's done.
Learn more about Emmet in the VS Code website.
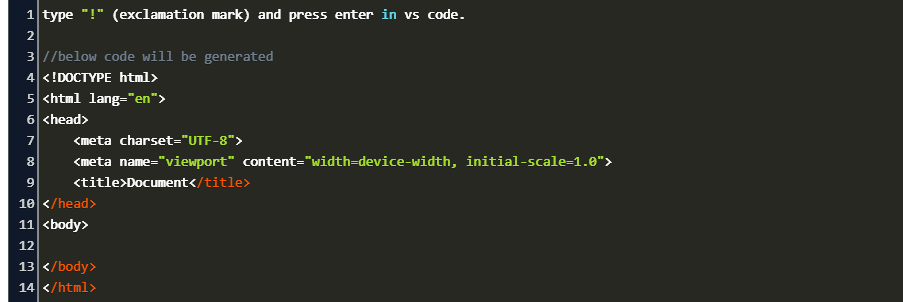
What will appear as a result of that is the folowing:
AND LATER, WHEN YOU PROGRESS IN FRONT-END:
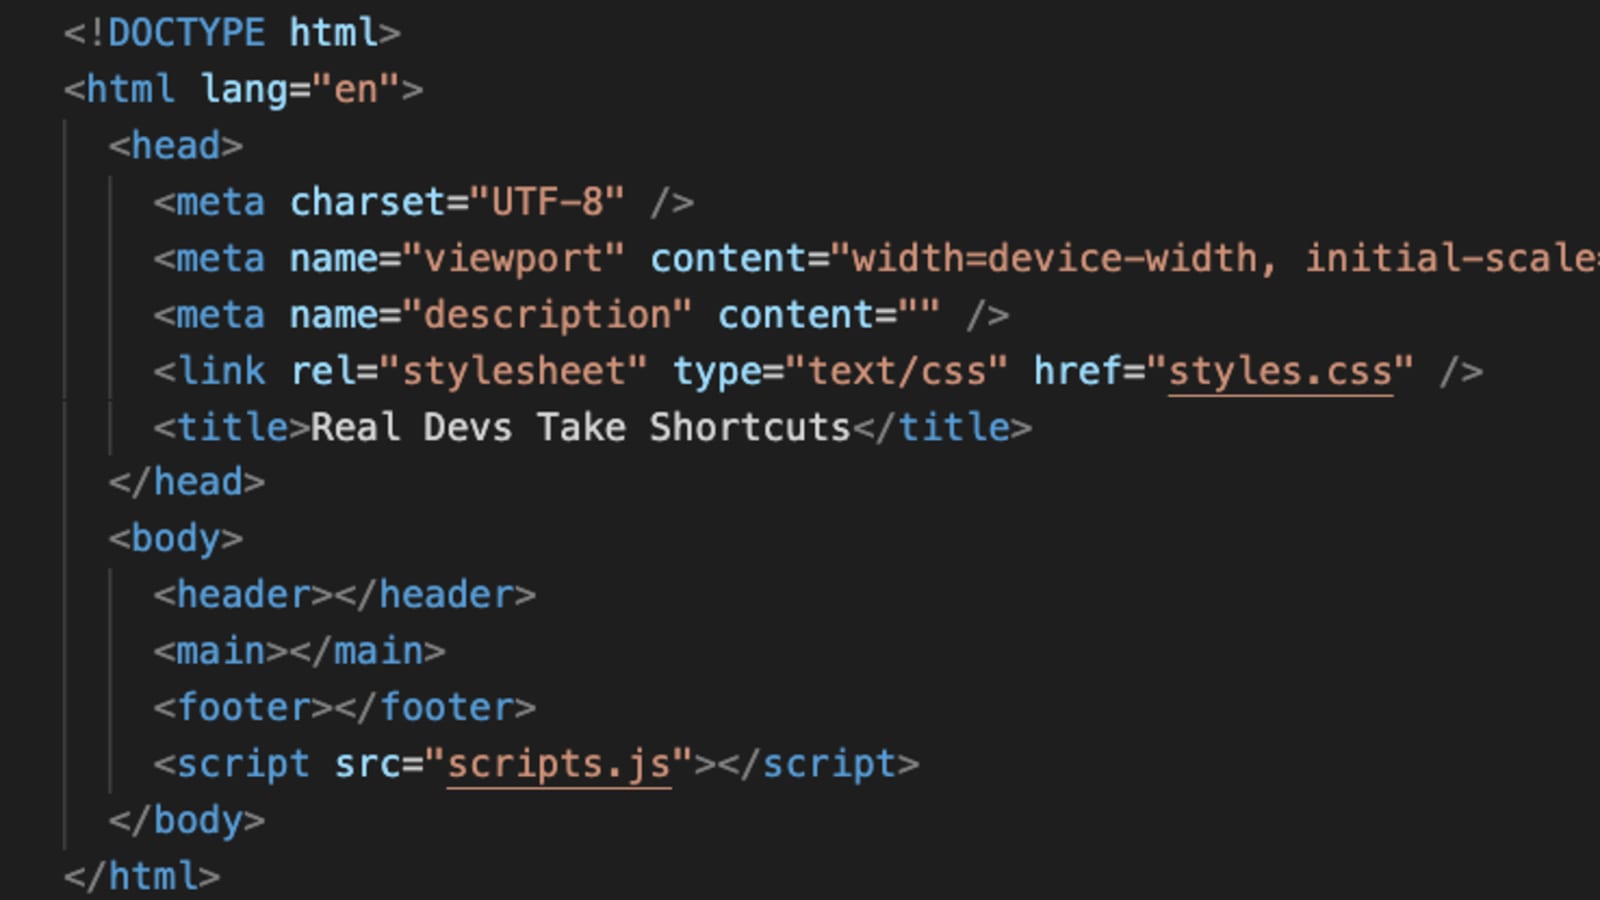
You will implement some mandatory things to that basic srtucture, like the:
-
Link to external* CSS stylesheet (in the
<head>area) -
The
<script>link (in the end of the<body>area) to an external* JavaScript document.
* External to the html document but still being part of your project.
See how the few extra implements will look like:
Title
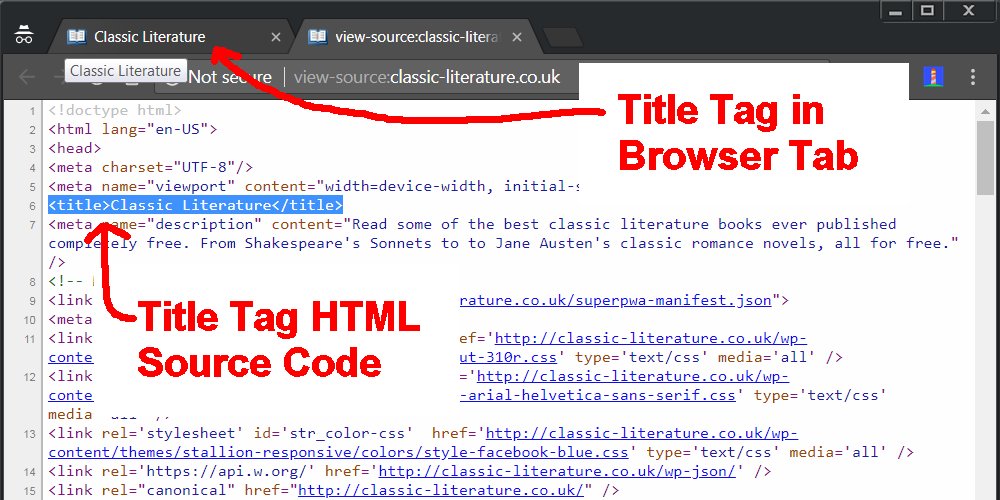
The <title> tag inside the <head> area is the name your page or website
will display in the TAB top.
An example from seo-gold.com:
HTML Semantic Elements
Semantic elements = elements with a meaning. HTML5 was built to be semantic, to attribute meaning to its content.
What are Semantic Elements?
A semantic element clearly describes its meaning to both the browser and the developer.
The opposite of that are the CSS styles, which give a form, a look to the content, like now.
Examples of non-semantic elements: div and span - Tell nothing about its content,
they just select an area (to be worked by CSS or JS).
Examples of semantic elements: <form>, <table>, and
<article> and many others. They clearly define their content.
But be careful where semantics meets logic:
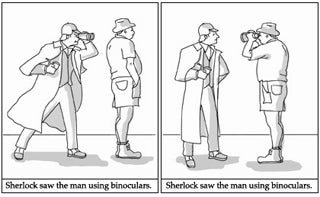
Learn more at w3schools.
hr tag
The <hr>* tag (hr stands for "horizontal rule". It makes an HORIZONTAL LINE). The the
red line above here. It's originally black but I applied some style (=CSS) to it in the head area of the
HTML basic structure (but here, in this paragraph, the colors/style were modified in the middle of the
paragraph (the so called "inline CSS" explained above.), using
<span> 3 times).
br tag
The br tag breaks a line like now
(for whatever reason you may have), without being a paragraph. (after
the word "now" there is a <br> tag)
del tag
The <del> tag marks a text as non-valid or deleted.
ins tag
The <ins> tag underlines the text to give the kind of enphasis s if he text has been
filled in the blank space, or inserted.
Don't confuse this tag with the "u" one. "U" is not semantic. It just underlines and that's it, no meanings whatsoever.
small tag
This tag can be used in those small contract/agreement/purchase order/invoice letters.
The "big" tag is not used any longer. It works, thou. This task (enlarging) now is CSS business.
sup tag
The superscript tag is good to format things like 1825+3, for instance.
sub tag
The subscript tag doesn't make it rain but can make the H2O formula.
Entities
Entities are used to return / display special symbols.
"An HTML entity is used to display invisible characters and reserved characters that would otherwise be interpreted as HTML code.
An HTML entity is a piece of text, or string, that begins with an ampersand ( & ) and ends with a semicolon ( ; ).
For instance, HTML will interpret the less-than sign ( < ) as a tag opening if you don't write it as an entity.
The < entity makes <
When I type the 3 characters above together (without scaping through an entity) they make this symbol: <
But if I want to show you the code that makes < I have to replace the & (ampersand) for its respactive entity, which is "&".
lt (LT in lowercase) means LESS THAN.
Always with a semicolon at the end.
The > entity makes >
The same as above applies here, with "gt" instead of that.
gt means GREATER THAN.
Always with a semicolon at the end, as well.
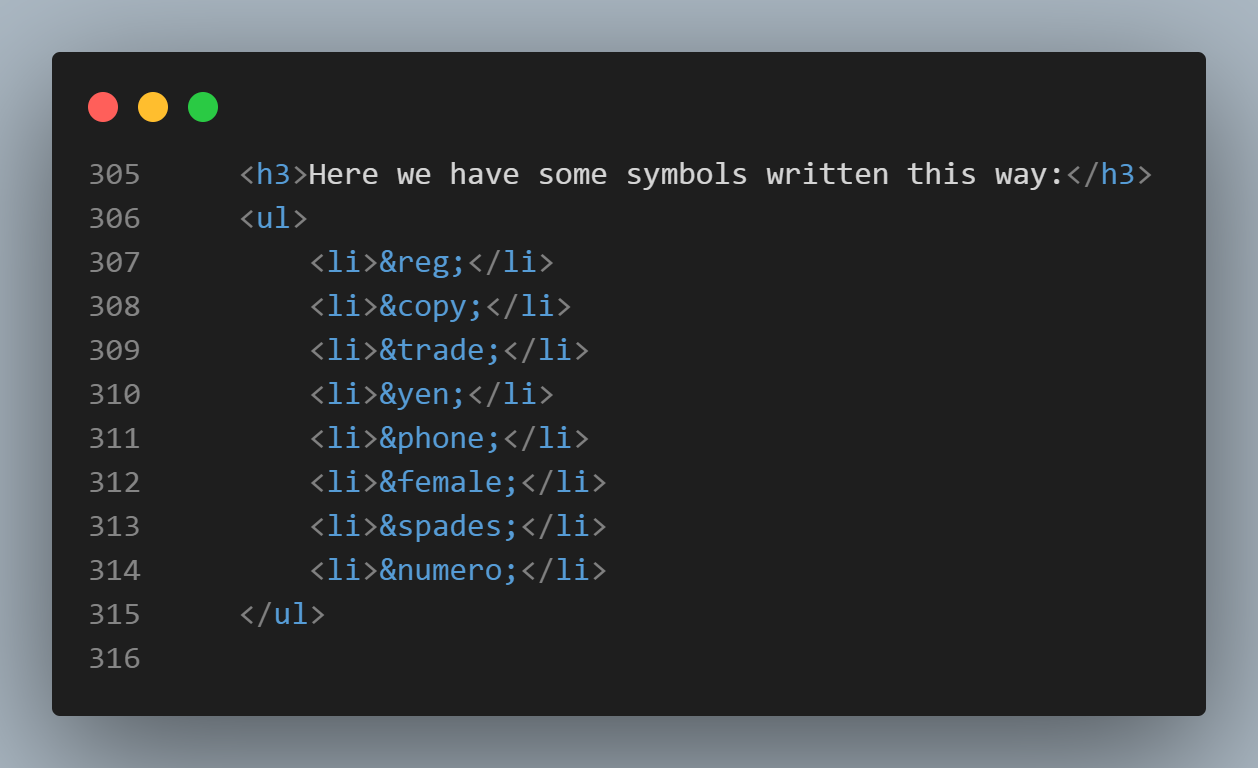
Here we have some symbols written this way:
- ®
- ©
- ™
- ¥
- ☎
- ♀
- ♠
- №
Here's the code:
Through this link you go to a COMPLETE LIST of html entities (more than 1,500), which will open in a new tab.
Emojis:
Emojis codes are a little more complicated to insert.
First go to a website like the one linked below and:
- Choose the emoji;
- Scroll down until you find the word "Codepoints".
- Copy that code and paste it in your editor.
- VERY IMPORTANT COMPLICATION: Remove the u+ and replace it with &#x then add a ; (semicolon) at the end.
- Could be easier. Should be easier. Must be easier!!!
- Of course when you get to the site linked below you may just copy and paste the emoji itself (just like that: 😊), but it won't work in some browsers, as teacher Guanabara said.
Through this link you to to a COMPLETE LIST of emojis and their codes.
And here we have some emojis coded the complicated (and only) way to code emojis:
- 🙈
- 👀
- 😊
Images
Always be sure that you are not violating copyrights when pasting images made by someone else into your website.
There are royalty free images around the web, like:
Or
Or many others.
This canyon image is from Pixnio. Very easy. You don't even have to register in their website. And you have size options. You can even chose a personalized one with the width or height of your preference.

How to add images to your page
1) From a folder of yours:
First, download the image to your "images" folder within your HTML project.
(If you're a beginner like me, going through Visual Studio Code tutorials is not a bad idea)
Then, in the VSCode editor: just type img and Emmet, the automatic assistant, will write the
rest for you. After it's done, place the cursor in between the first pair of quotation marks (src="") of the
"img" tag, press ctrl+spacebar and chose your image from your folder on the dialogue box.
The second pair of quotation marks (alt="") of the "img" tag are for you to write a quick description of the picture. It serves to appear in the screen in case the image doesn't load for any reason AND to be read out loud for those who wish the browser to do that.
2) Straight from another website:
Copying an image address from another website is an alternative way of adding an image to your page.
The disadvantage is that the image in your page will always depend on the existence of the original one and more: it must be exactly where it was when you copied the eddress. If their website crashes, your linked image crashes. If they change anything in the addres, the link is gone and so does the image.
Just right click any image of any website and choose "copy image address" (or whatever is closer to that). Then, paste it between the first pair of quotation marks (src="") of the "img" tag.
Again: The second pair of quotation marks (alt="") of the "img" tag are for you to write a quick description of the picture. It serves to appear in the screen in case the image doesn't load for any reason AND to be read out loud for those who wish the browser to do that.
This is an example (linked from G1.com):
/i.s3.glbimg.com/v1/AUTH_59edd422c0c84a879bd37670ae4f538a/internal_photos/bs/2022/8/c/wBz1OySaygj4v3cLRJTw/0102-cadeira-escritorio-ergonomia.jpg)
Types of images
In a few words:
JPG (or JPEG) Is better if you want a big image with less weight, like this one:

PNG images are better if you want the picture itself to have a transparent background (and no picture frame), like these ones:


I've implemented a blue background (in a "div" "class" called "balls-hand"
inside another div class called "blue" in the head sector of this HTML document) to make it easier to check
the image's transparency and to align them.
Images from pngwing.com .
If you want to optimize the image, please use GIMP freeware (the "free photoshop") to "save for web" (a plugin) and automatically reduce a lot of the image's weight without loosing much quality.
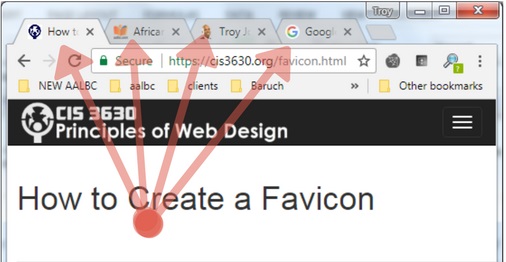
Favicon
"A favicon is a small icon or collection of icons associated with a website, web page, or web application. It's displayed within the browser tabs and bookmarks bar". Favicon.io
"A favicon is used to help users visually identify websites, web pages, and web applications within browser tabs, bookmarks, shortcuts, and address bars more easily. It's important to have a favicon for your website for brand recognition so that your users can easily identify your site in their browser tabs and bookmarks". Favicon.io
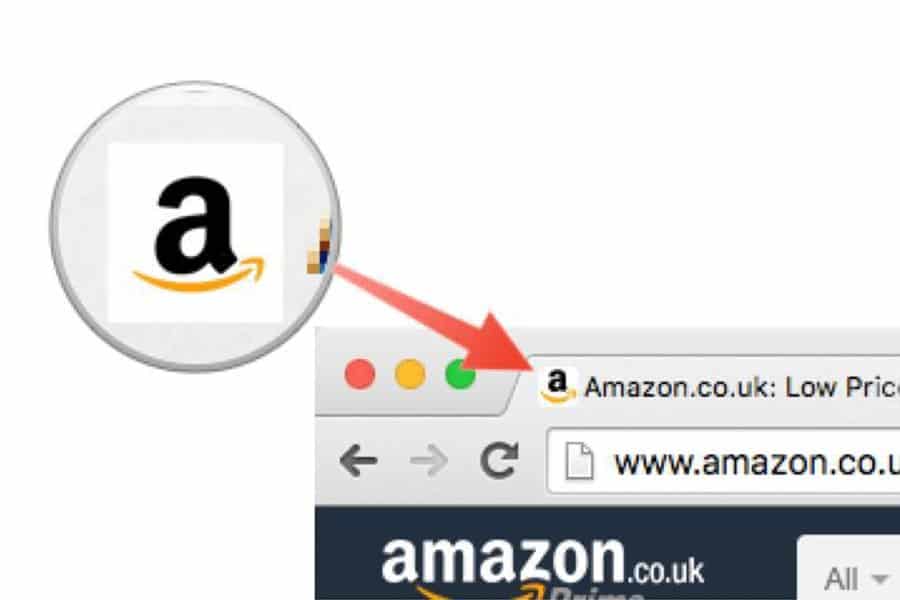
Examples of favicon:
What are common favicon file formats?
ICO - favicon.ico
"The most common favicon formats are ICO, PNG, and SVG, but there are additional formats for specific browsers or devices. The ICO file format was developed by Microsoft and is the original file format for the favicon. The format is unique because it allows for multiple small images within the same file. This is advantageous because the small icons required for a favicon in ICO format (16x16, 32x32, and 48x48 pixels) can be scaled and optimized independently. At small dimensions you can't rely on the browser to automatically resize your icon in an optimal way. The ICO format is supported by all browsers and it's the only format that IE5 through IE10 supports". Favicon.io
PNG - favicon.png
"The PNG format is a nice format because it's a format that most people are used to and doesn't require any special tools to create. With modern screens being high resolution the original problem of small icon dimensions for small resolutions no longer exists. For browsers that support the PNG favicon format oftentimes the quality of the favicon displayed within the browser tab or bookmarks bar will be higher than the ICO format. The disadvantage of the PNG format is that it's not compatible with IE5 through IE10". Favicon.io
SVG - favicon.svg
"The SVG format has benefits over the PNG and ICO formats, but doesn't have great browser support yet. SVG files (Scalable Vector Graphics) are very lightweight and, being a "vector" graphic, they are infinitely scalable. This means that image quality is superb without sacrificing load times for heavy images. Only Chrome, Firefox, and Opera support SVG format favicons". Favicon.io
How to add a favicon to the page/site:
In the head area of the HTML code you type link. One of the Emmet Abbreviations the assistant
will suggest says link : favicon.
Delete whatever comes written in the "href" quotation marks and press ctrl+enter to choose your own favicon image from your project's folder (all this in the Visual Studio Code, of course).
And don't change anytinng else in this code line given by Emmet. (Those colors here are some "span" + "style" testing.)
Bold and Italic
Here I make a bold word using the <strong> tag.
Better NEVER use the tag <b> to make bold. It's not semantic. This tag
should be used to markup text as bold without conveying any extra importance, for example in article
abstracts, where the beginning of an article is set in bold text
.
(quackit.com).
And here's an italic word made with the <em> tag.
Avoid using the tag <i> for italic. It's not a much appropriate
semantic element.
Wrap with abbreviation (a VS Code shortcut)
To put any lenght of text (from a single letter to a group of paragraphs) inside a tag:
Just press Ctrl + shift + p then find "wrap with abbreviation", select it with enter and type only the letters that represent the tag you want. Only the letters, without the < and > signs. And enter to finalize. Ready! It's wrapped. The next times you do that, just press ctrl+shift+p and the option will already be there in the recent history and you proceed with the rest of the instructions above.
Mark the text
The <mark> tag makes the above <h1> heading (which I had "styled" to
green) return to its original color, black.
If you want it to continue the green CSS style I have defined for all <h1> tags you have
to force it by applying an INLINE CSS to the <mark> tag opening as follows:
Mark the text
And if the yellow mark doesn't match your overall background-color, just do the same as above adding a background-color to the mark's opening tag style. See:
Mark the text
Mark the text. Don't mark bobeira!
HOW TO DISPLAY CODE
The <code> tag:
The code tag above is between the <code> tags, which turns the fonts into
"monospaced". The black background and the green font color are CSS styles I have
added. The same happens with the open and close tag symbols, which I added through the "HTML entities" we
will see in the next topic.
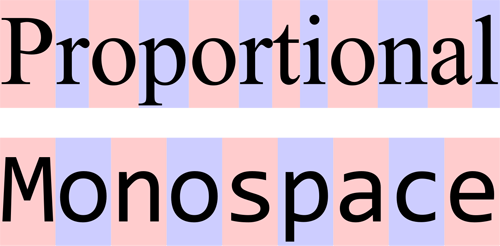
A monospaced font, also called a fixed-pitch, fixed-width, or non-proportional font, is a font whose
letters and characters each occupy the same amount of horizontal space. This contrasts with
variable-width fonts, where the letters and spacings have different widths. Check the comparison
below.
(From Wikipedia).
If you just put a JS code snippet into a <code> tag it does not replicate the line breaks
and the identing, like the example below:
matches.forEach(function(match) {
match.parentNode.removeChild(match);
});
It's just rendered as monospaced font (and - in this particular case - plus the black and green CSS I applied to all the code tags).
The <pre> tag:
So if you really want it to be displayed like the real code in the editor you must apply the
<code> tag inside the <pre> tag (check the
source).
This tag also displays the text as it is formated at the origin, or PRE-formated (hence the name of the tag).
And it renders code as follows:
matches.forEach(function(match) {
match.parentNode.removeChild(match);
});
Important remarks:
- Line height was set to 18px so the braces opening was not cut by the second line background color.
- Only here I "removed" (by applying - inline - other style upon the black and green) the black and green CSS I applied to all the code tags (with regrets and I've learned from that) .
Here's additional information about that from my Rocketseat course page:
Please, pay attention where it mentions the HTML entities.
<pre> The PREFORMATED TEXT element according to MDN Web Docs:
What is  ?
?
(This is the old logo. The MDN logo has changed as from March 1, 2022 - I coudn't get any to show here. And now I discovered that I didn't get any because so far there's none "ready made": The new logo is built from CSS traces, not a png or jpg image.).
OPS! Just after writing this (on March 3/2022) I found a png one at Wikipedia, and here it is:
The HTML element represents preformatted text which is to be presented exactly as written in the HTML file (*!!!). The text is typically rendered using a non-proportional, or monospaced, font. Whitespace inside this element is displayed as written. Check it at MDN
*!!! Be careful !!! - It's not quite like that, as the very site continues:
If you have to display reserved characters such as
<, >,
& and " within the <pre> tag, they must be escaped using their respective HTML entity.
IN OTHER WORDS, YOU MUST CANCELL THE HTML "CODE EFFECT" OF THOSE SYMBOLS (when displaying code) AS FOLLOWS:
Do you remember what HTML entities are?
We've seen them above (check first).
Now let's review and see where they fit:
Entities are used to return / display special symbols.
"An HTML entity is used to display invisible and reserved characters that would otherwise be interpreted as HTML code.
n HTML entity is a piece of text, or string, that begins with an ampersand ( & ) and ends with a semicolon ( ; )./p>
For instance, HTML will interpret the less-than
sign ( < ) as a tag opening if you don't write
it as an entity.
The < entity makes <
When I type the 3 characters above together (without scaping through an entity) they make this symbol: <
But if I want to show you the code that makes < I have to replace the & (ampersand) for its respactive entity, which is "&".
lt (LT in lowercase) means LESS THAN.
Always with a semicolon at the end.
The > entity makes >
The same as above applies here, with "gt" instead of that.
Here we have some symbols written this way:
- ®
- ©
- ™
- ¥
- ☎
- ♀
- ♠
- №
Through this link you to to a COMPLETE LIST of html entities (more than 1,500), which will open in a new tab.
QUOTATIONS
1) The <q> tag
I could use the keyboard to put a text "between quotation marks", like I did now.
But it would not be semantic.
A small review about semantics:
A semantic element clearly describes its meaning to both the browser and the developer
Examples of non-semantic elements: <div> and <span> - Tell nothing
about its content. They just select an area (to be worked by CSS or JS)
Examples of semantic elements: <form>, <table>, and
<article> - Clearly defines its content.
2) The <cite> tag
The <cite> attribute is not displayed in the screen. Its purpose is to orient SEO... And
most of all it specifies a URL to a document that explains:
- A section that is quoted from another source
<blockquote>(see below), or - The quote
<q>(see below), or - Why the text was inserted
<ins>(check the ins tag above), or - Why some text was deleted
<del>(check the del tag above), containing a URL to a document that explains the deletion .
3) The <blockquote> tag
The HTML <blockquote> element defines a section that is quoted
from another source.
Browsers usually indent <blockquote> elements and that's it. No
quotation marks, no italic. Look:
Here is a quote from WWF's website:
For 50 years, WWF has been protecting the future of nature...
WWF works in 100 countries...
See how the code gets:
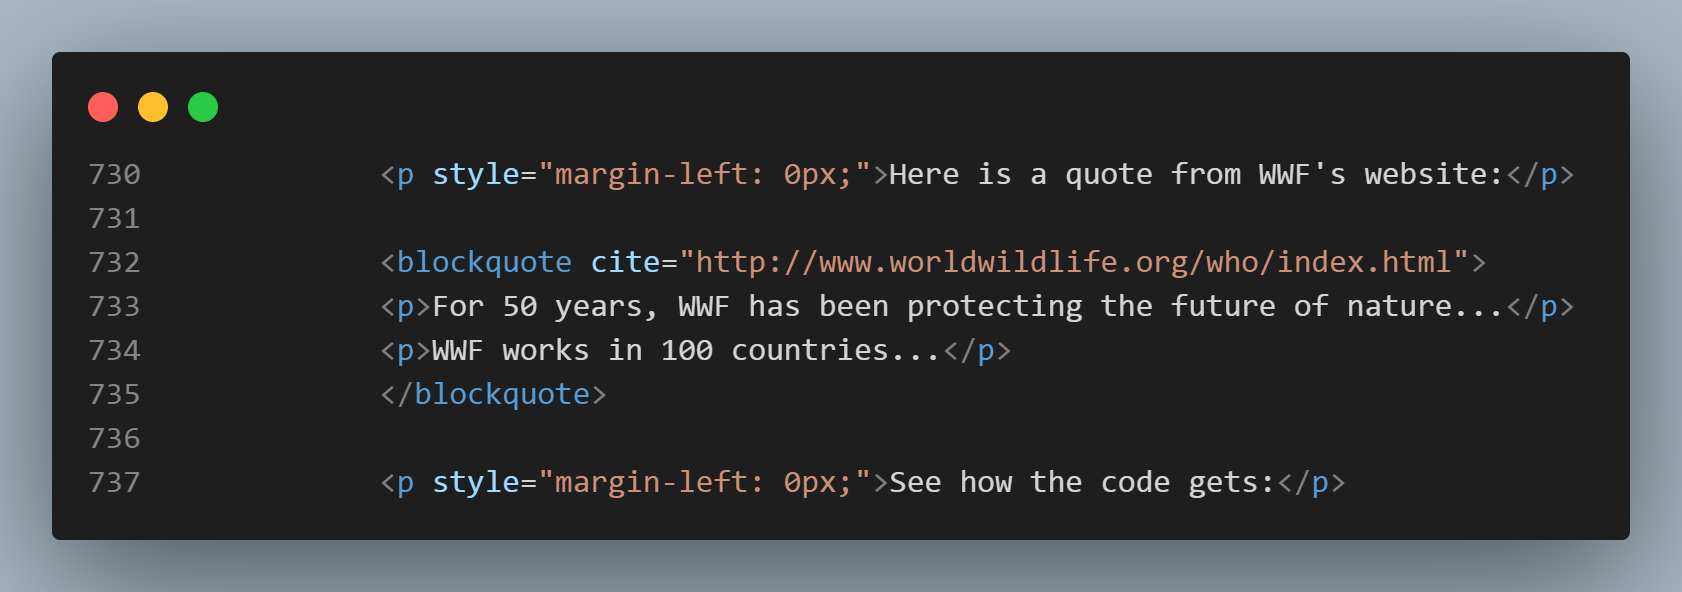
You see that by the time I first made this page (feb/2022) I did the "not good practice" inline CSS. I'll leave it here as a witness of the learning precess.
4) The <abbr> tag
The <abbr> tag defines an abbreviation or an acronym, like "HTML", "CSS", "Mr.", "Dr.",
"ASAP", "ATM".
In VSCode, Emmet brings it to us already with the global <title> attribute to show the
description for the abbreviation/acronym when you mouse over the element. Example:
If you pass the mouse pointer over the HTML abbreviation you will see its meaning.
LISTS
1) Ordered lists
An ordered list starts with the <ol> tag. Each list item starts with the
<li> tag.
Example:
- Coffee
- Tea
- Milk
The code looks like that:

This screenshot was obtained by VSCode's CodeSnap extention I have just installed.
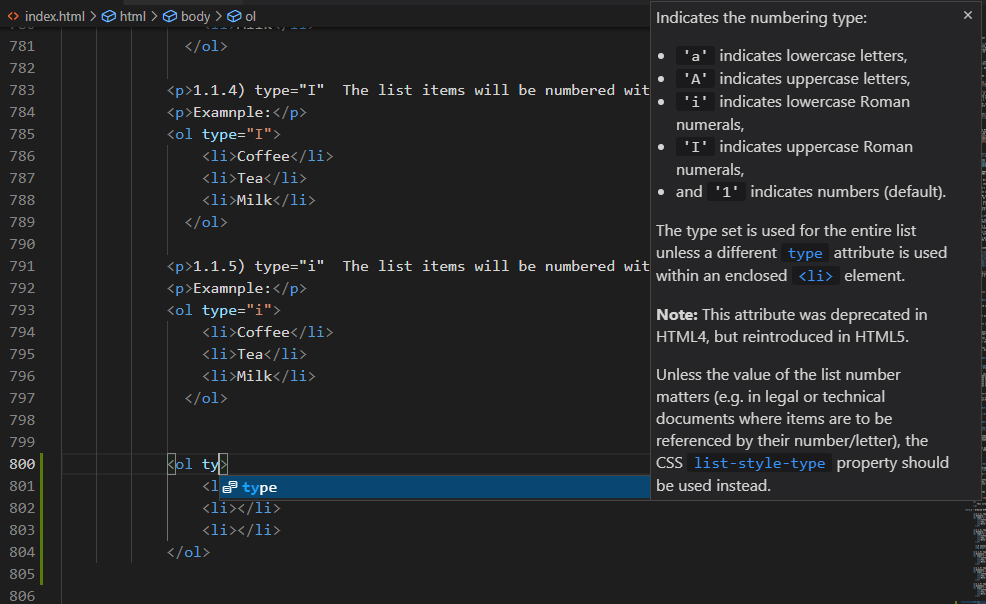
1.1 - Ordered HTML List - The Type Attribute
Once you start typing the word "type", Emmet gives you the hints:
1.1.1) type="1" The list items will be numbered with numbers (default)
Example:
- Coffee
- Tea
- Milk
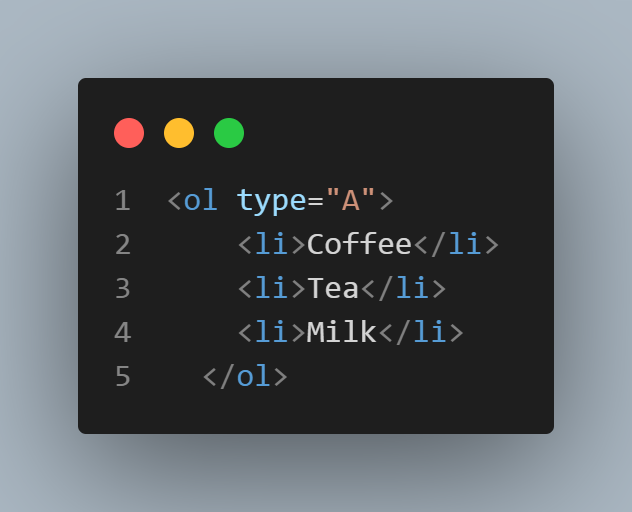
1.1.2) type="A" The list items will be numbered with uppercase letters
Example:
- Coffee
- Tea
- Milk
A syntax example taken from Type A:
1.1.3) type="a" The list items will be numbered with lowercase letters
Example:
- Coffee
- Tea
- Milk
1.1.4) type="I" The list items will be numbered with uppercase roman numbers
Examnple:
- Coffee
- Tea
- Milk
1.1.5) type="i" The list items will be numbered with lowercase roman numbers
Examnple:
- Coffee
- Tea
- Milk
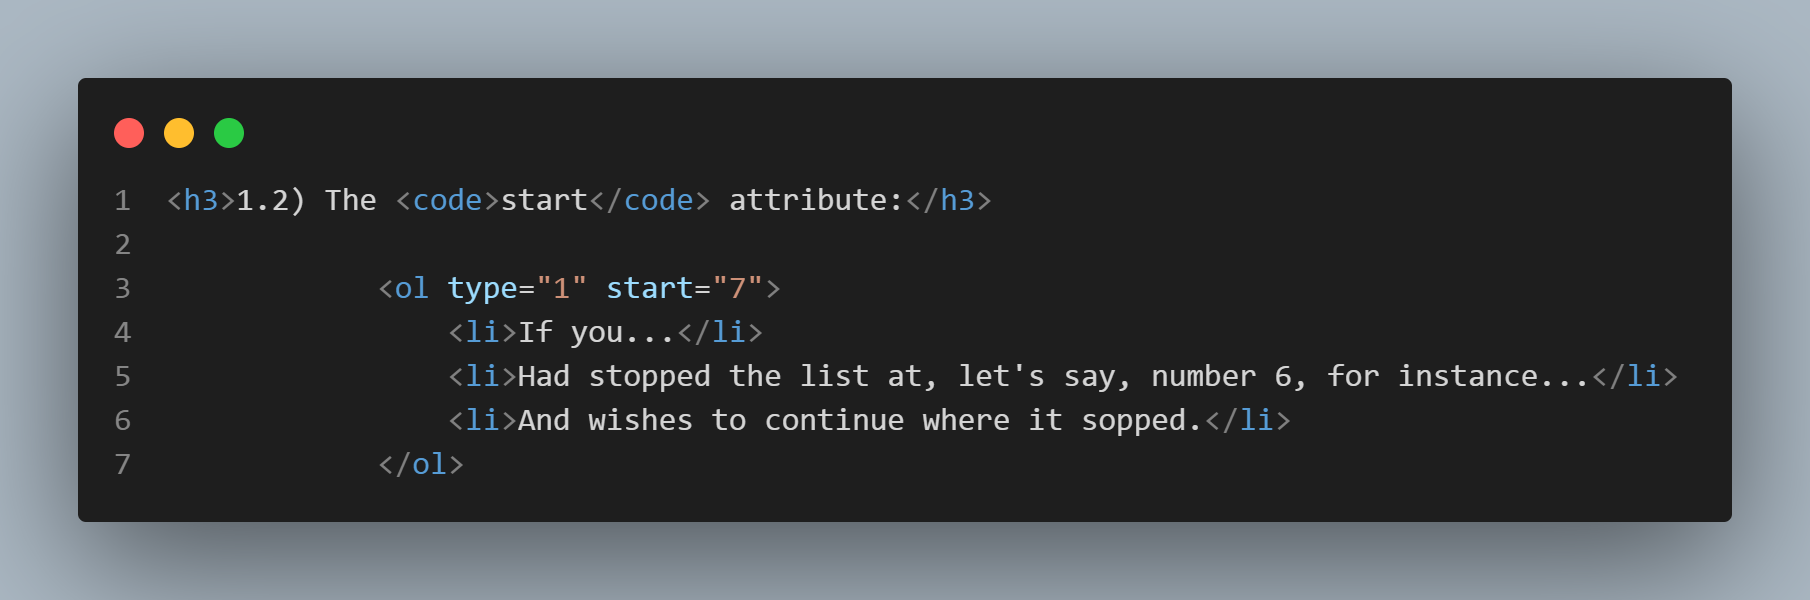
1.2) The start attribute:
- If you...
- Had stopped the list at, let's say, number 6, for instance...
- And wishes to continue from where it sopped.
The code stays this way:
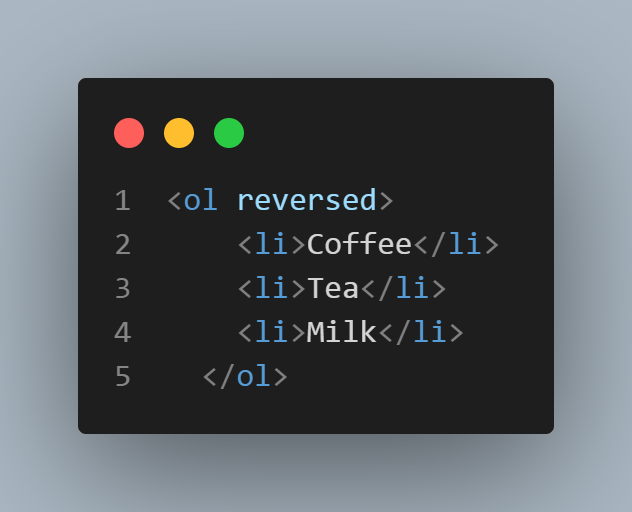
2) Reversed order lists
The reversed attribute is a boolean attribute. When present, it specifies that the list order
should be descending (9,8,7...), instead of ascending (1, 2, 3...).
Example:
- Coffee
- Tea
- Milk
Syntax example:
3) Unordered lists
The HTML <ul> tag defines an unordered (bulleted) list. (Same syntax as
<ol>).
Example:
- Coffee
- Tea
- Milk
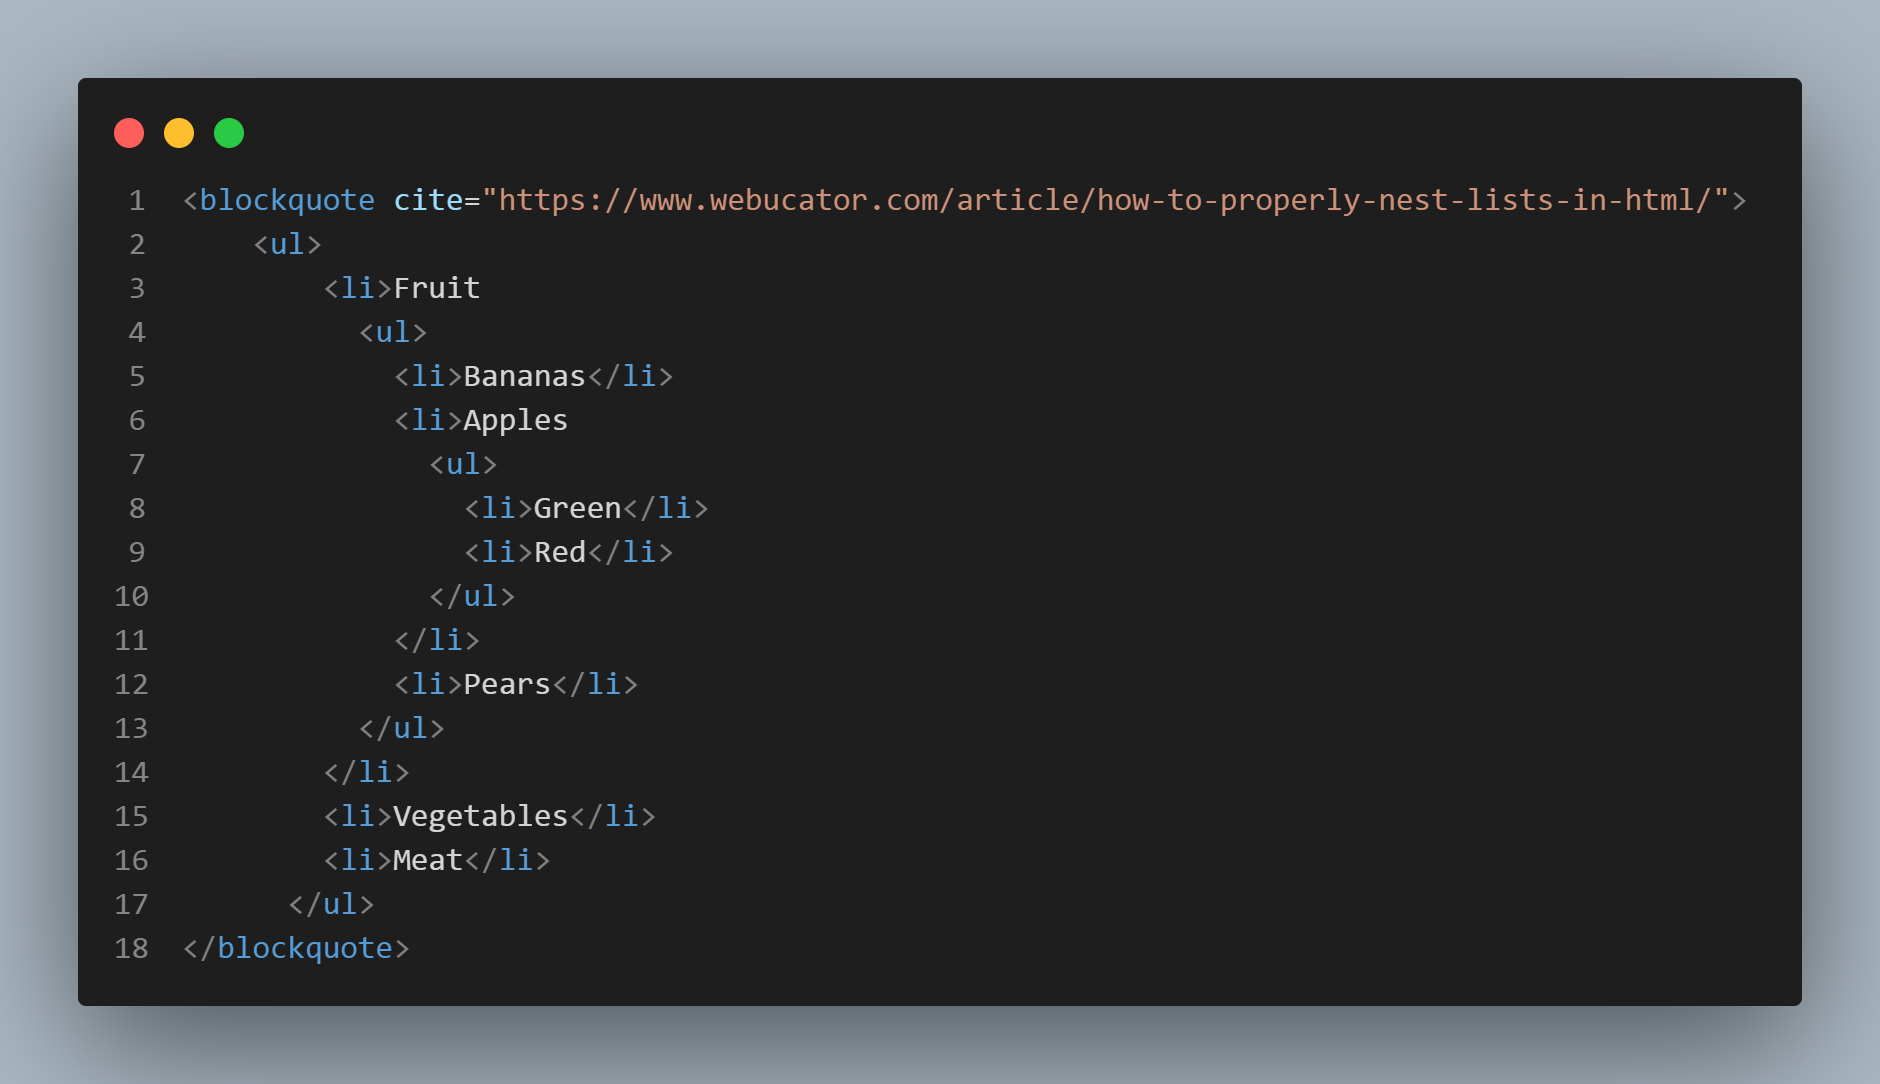
4) Nested lists 1
- Fruit
- Bananas
- Apples
- Green
- Red
- Pears
- Vegetables
- Meat
See how the nested list code is:
4.1) Nested lists 2
Example of programming languages:
- Old ones
- Clipper
- Fortram
- Fort1
- Fort2
- Visual Basic
- Delphi
- New ones
- PHP
- Python
- JavaScript
- Kotlin
Just to show the feature I set the start of the "new ones" to "5", meaning the 5th letter of the sequence.
And I invented "Fort1" and "Fort2" just to show you that the unordered nesting cause a progressive indentation. Like the fruits in "nested lists 1" above.
5) Description lists
A description list is a list of terms, with a description of each term.
The <dl> tag defines the description list
The <dt> tag defines the term (name)
And the <dd> tag describes each term:
Example (I've set a 100px margin left to indent the whole example):
- Coffee
- A black hot drink
- Milk
- A white cold drink
Syntax example:
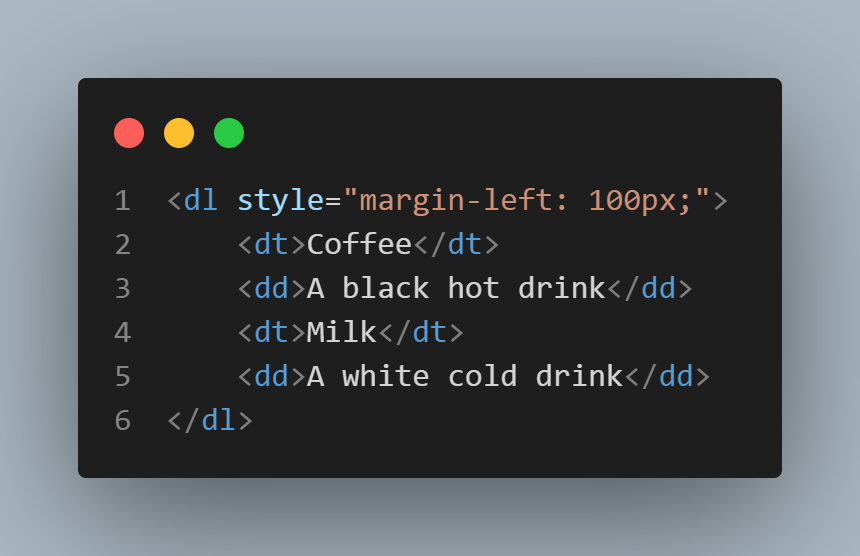
Note that the example is not indented because the code is indented. It's because of the 100px
margin I have set.
LINKS
"Links are found in nearly all web pages. Links allow users to click their way from page to page". (w3schools)
More than that, the <a> HTML anchor element, with its href
attribute, can create hyperlinks to:
- web pages,
- files (including video and sound),
- email addresses,
- locations in the same page,
- or anything else a URL can address.
MUCH more can be said about links and the <a> tag and you may read it at MDN Web Docs, but here we will stick to the following:
- External links (When there's a full web address in the href attribute, it is called absolute URL).
- Internal links:
- To pages of the same website (A local link - a link to a page within the same website - is specified with a relative URL (without the "https://www" part):
- Belonging to the same folder as the current one.
- Stored in another folder of the same website.
- To a certain line (or section) of the same page.
- A download link.
1) External links
This kind of link is made to an absolute URL (includes the "https://www" part).
Example:
You can access my public repository at Github by clicking here.
The HTML element:
<a href=""></a>
a means anchor and href means hypertext reference.
<a href="the URL comes here">and the text that will become hyperlink comes here</a>
And there's something very important:
As you can see in the code below, there are a "target" and a "rel" attributes, meaning:
- target="blank" means that the target page will be opened in a new tab of your browser.
- rel="noopener noreferrer" means that the opening of a new tab will avoid undesired invaders (crackers). Not doing this can be risky.
Check the code:

2) Internal links
2.1) Link to pages of the same website:
This kind of link is made to a relative URL (without the "https://www" part).
2.1.1) Belonging to the same folder as the current one.
Just click here to go there.
2.1.2) Stored in another folder of the same website.
And here you go to a page stored in the "new-folder".
2.2) Link to a certain line (or section) of the same page, in 2 steps:
a) First, you use an id to give an unique name to the destination point of the future link.
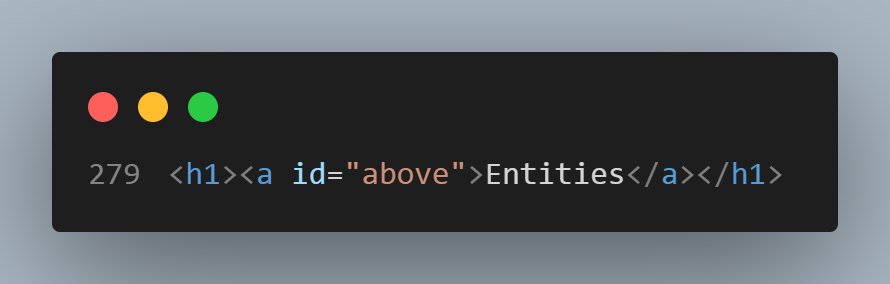
b) And soon after that you make the link through the usual <a> tag, pointing the hypertext
reference (href) to the id through a # plus the name of the id.

2.3) Download link:
From here you can download a PDF book from Curso Em Vídeo about the Internet History.
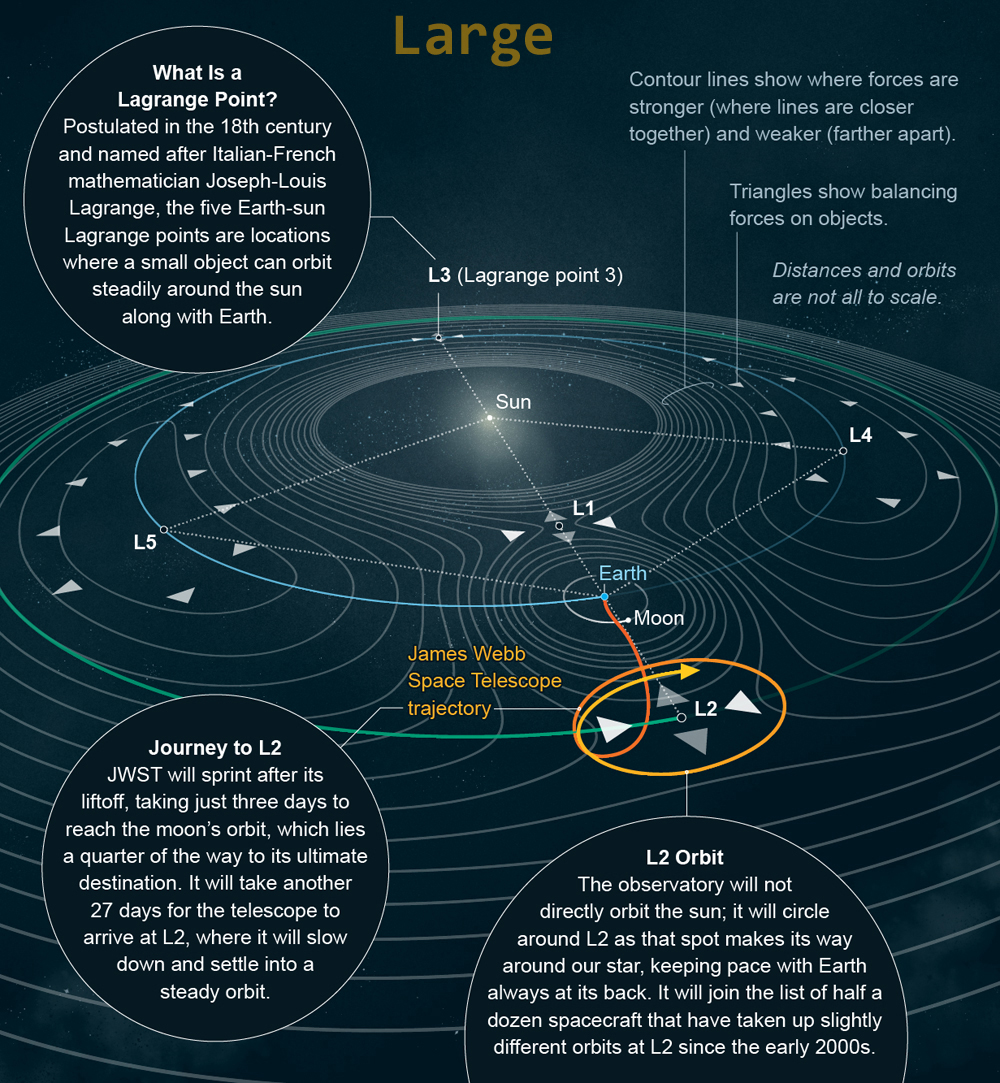
RESPONSIVE IMAGES
This helps to improve performance across different devices. Responsive images are just one part of responsive design, a future CSS topic for us to learn.
We will learn how to use features like srcset and the <picture> element to
implement responsive image solutions on websites.
After applying the HTML elements below, open this page in different devices such as a PC, a tablet or a cell phone to see the magic working. If you don't have several devices in hand, just gradually shorten/enlarge the size of your browser.
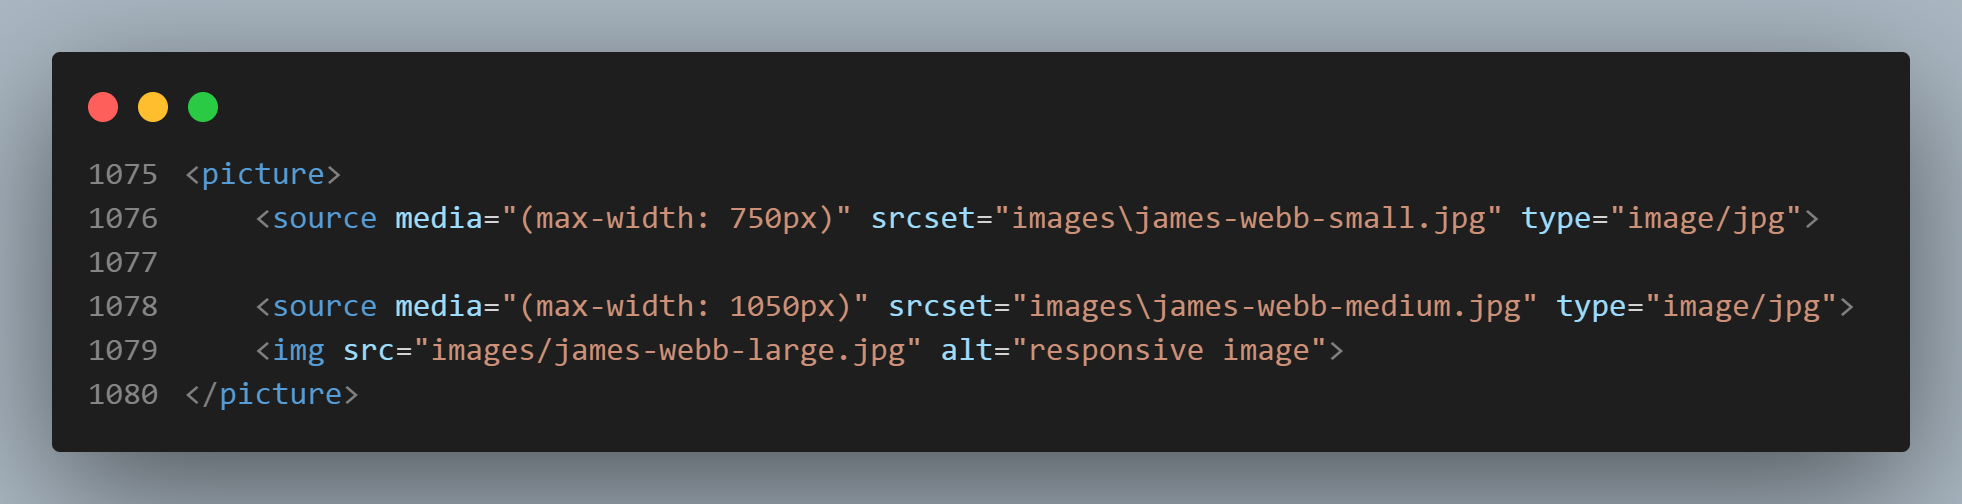
You can check the details of this feature at MDN Web Docs.
ADDING AUDIO
There are two ways of inserting audio into your page:
- The
<audio>tag. - The
<audio>plus<source>tags.
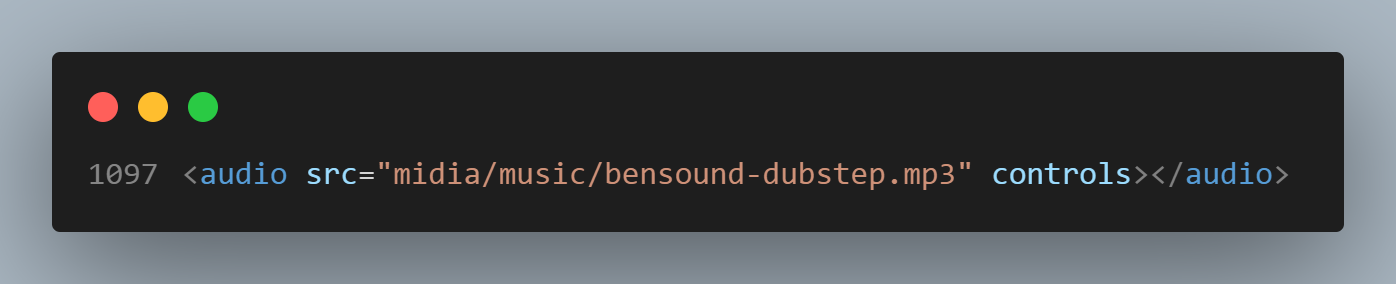
The <audio> tag
This is "Dubstep", from Bensound:
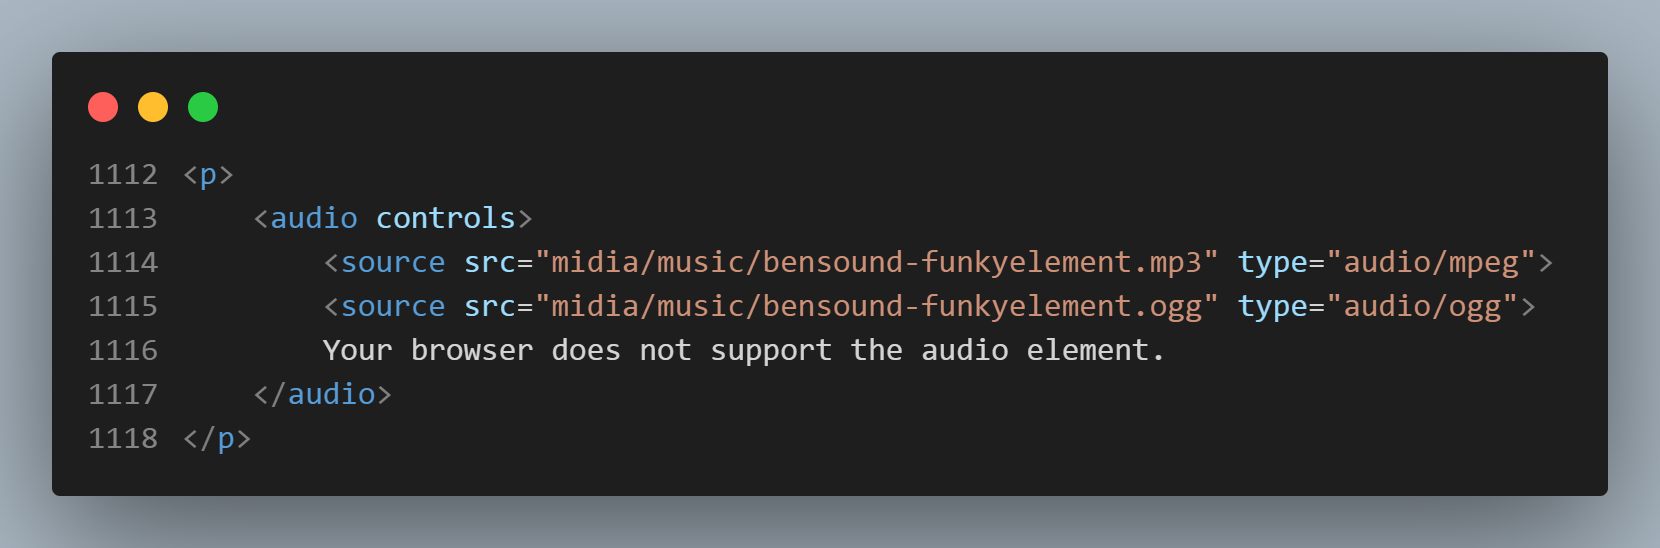
The <audio> plus <source> tags
The <source> element allows you to specify alternative audio files which the browser may
choose from. The browser will use the first recognized format.
And here you have "Funkyelement", also from Bensound:
Suppose I had an alternative "ogg" oudio format for this song (which I don't, as you will see in the code. I just staged the snippet to print the image as an example). I would put it just below my main option, which now is the "mp3". If your browser for any reason would not recognize the mp3 file, it would automatically play the ogg one.
VIDEO
1) Hosting video in your own website - the <video>; element.
Before anything, be careful! Using this element to embed videos may cause a heavy increase of traffic costs to your website. Read more at Wave.video
To show a video in HTML, use the <video> element:
Example
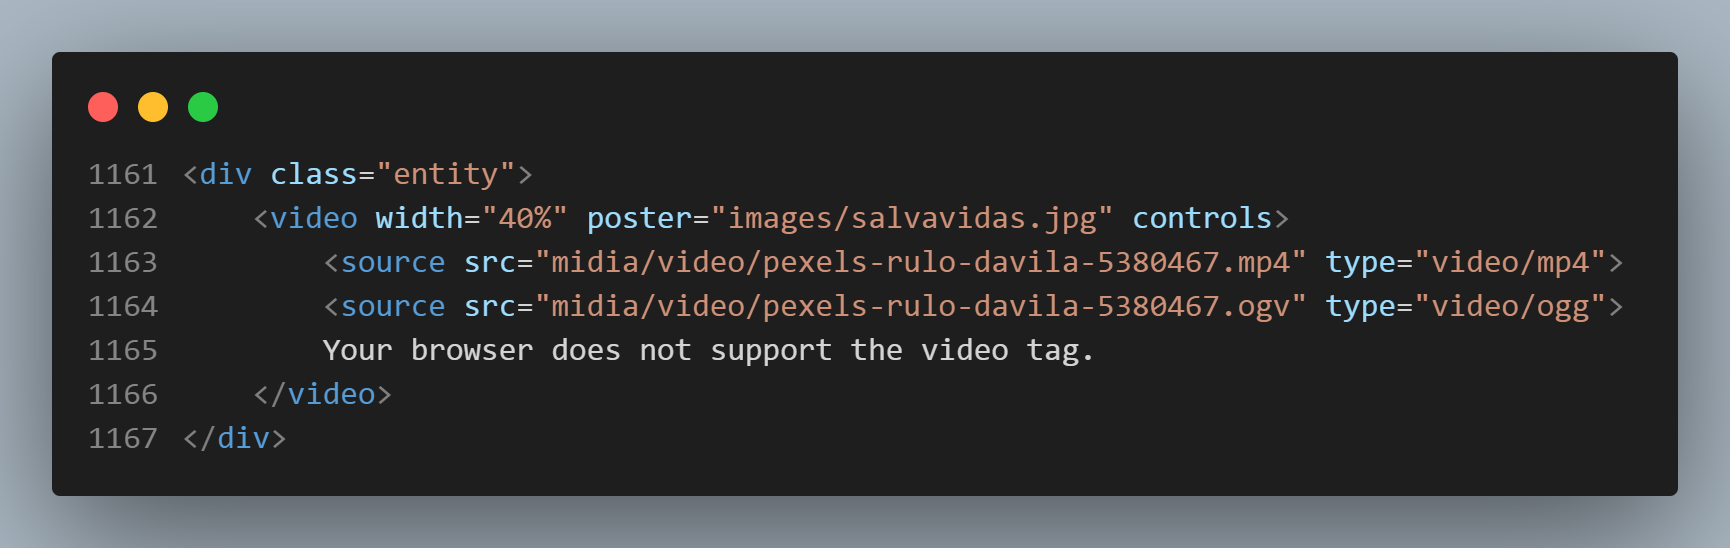
The controls attribute adds video controls, like play, pause, and volume.
The poster attribute shows a cover for the video before the first frame.
The <div class="entity"> puts the video inside a purple box. It's a CSS style I've used
some times in this page.
"It is a good idea to always include width and (I would say OR) height attributes.
If height and width are not set, the page might flicker while the video loads". (w3schools)
Anyway, I have set here ONLY the width to avoid disturbing the original width x height
proportion. For my personal choice I had first set at 40%, then changed to 30%. The snippet image
above is just an example copied from w3schools and placed in my code for some minutes. And I have no "ogg"
video file either.
The <source> element allows you to specify alternative video files which the browser may
choose from. The browser will use the first recognized format.
Teacher Guanabara advices us to use Handbrake video transcoder app to make different versions of our video, but the app doesn't run in my 8.1 Windows. So I'll pretend I have an OGV video just to give you an example of how the code gets.
The text between the <video> and </video> tags ("Your browser does
not support the video tag.") will only be displayed in browsers that do not support the
<video> element.
To start a video automatically when the page is loaded, use the autoplay attribute (I understand
that won't work in "V8" powered browsers, like Chrome) after the width and height
parameters, instead of "controls
Note: Chromium browsers do not allow autoplay in most cases. However, muted autoplay is always allowed.
You can also add the loop attribute o the video element to keep the video running again and
again.
For complete detais about the video element, check MDN Web Docs.
Video from:"https://www.pexels.com/pt-br/video/asfalto-barco-bote-canal-5380467/" Author: Rulo Davila, at Pexels
Poster picture: Photo by Bicanski at Pixnio.
2) Embedding Video on Your Website.
The basic HTML structure for embedding videos is:
<iframe src=”URL'></iframe>
This snippet of code helps display the video on your website. It pulls the video from its original source, without actually “forcing” you to host it on your website. This implies that you won't have to worry that a video will affect your website load time, and it also opens up an array of choices between various video hosting services that best suit your needs.
In a few words, it improves your SEO rating. And if you embed a video from your own YouTube channel it HIGHLY improves your SEO rating, as Guanabara says in the video below.
One simple way of embedding a video is from YouTube:
- Go to YouTube.
- Navigate to the video you wish to embed.
- Click the Share link below the video, then click the Embed link.
- Click the Copy option and the embed link will be highlighted in blue.
- Paste it to your code.
Here's a video embeded this way:
CSS
There are three ways you can use to implement CSS into your HTML:
- "INLINE": Applyed to a specific HTLM element in a line or paragraph;
- "INTERNAL": When it's added in the "head" section of your document;
- "EXTERNAL": All the CSS lies on a separate document in your project, properly linked to the HTML document. That's the most used way.
Read more about it at w3schools.
1) INLINE CSS:
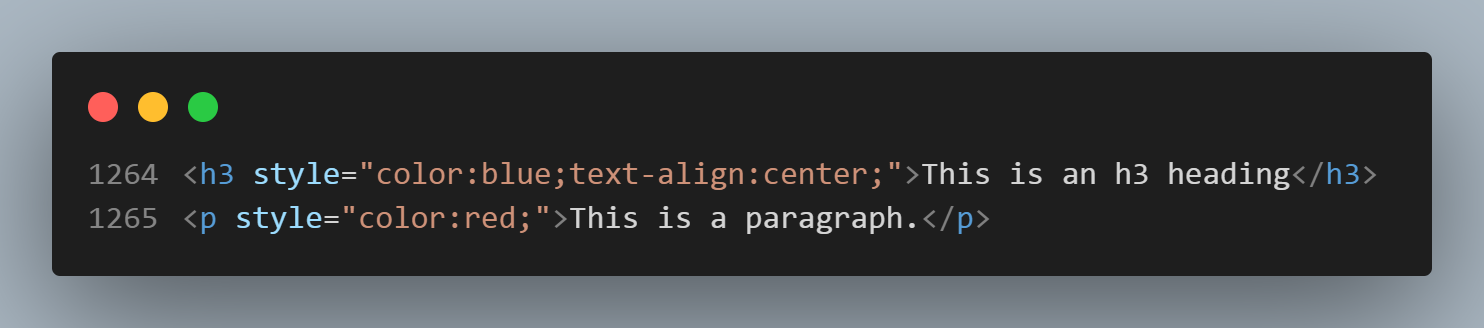
An inline style may be used to apply a unique style for a single element. To use inline styles, add the style attribute to the relevant element (h1, h2, p, span, div, etc.). The style attribute can contain any CSS property.
Example:
This is an h3 heading
This is a paragraph.
This is the code for the given example:
The disadvantage of this method is that you have to repeat the style in every element of the website, one by one.
The advantage is that it personalizes a given element.
2) INTERNAL CSS
It styles only the web page it's in. You should have to copy the code to as many pages your website has if you want all the pages to have the same overall style. Not practical.
But internal CSS can be useful to highlight one page.
it's added in the "head" section of your document, which here is setting 1) a left margin for the whole body section and 2) The font family to all the paragraphs of the page, as you can see in this code snippet:
You can check the basic CSS syntax at www.w3schools

3) EXTERNAL CSS
With an external style sheet, you can change the look of an entire website by changing just one file!
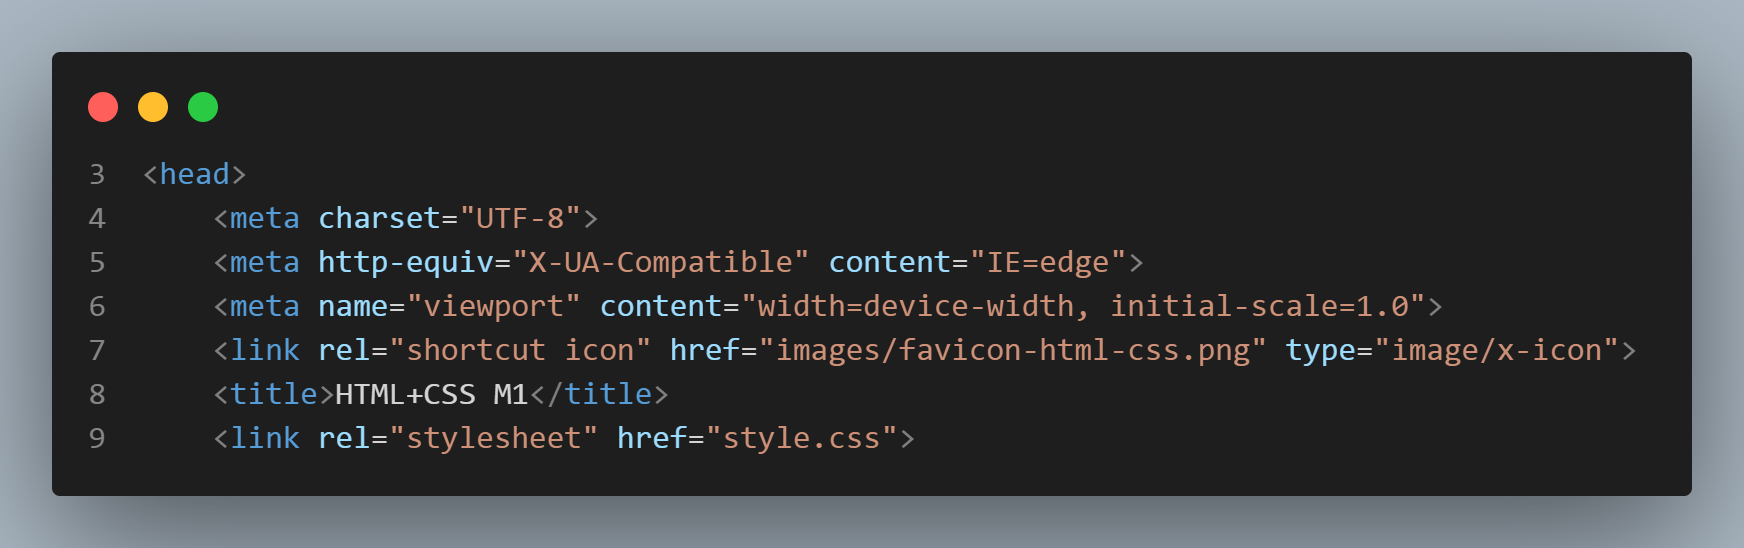
Each HTML page must include this simple and unique reference to the external style sheet file which is the
<link rel="stylesheet" href="style.css"> element, inside the head section.
And here's how the code gets:
Important CSS remarks:
This course is beginning with HTML5 but I decided that a little CSS is needed from the beginning so I can start practicing. I know that my self-taught CSS is far from being ok, though.
CSS3 lessons will come around mid march/22. I say this on February 11, 2022.
There are three ways you can use to implement CSS into your HTML:
This purple box here (and its drop-shadow) was implemented by the "EXTERNAL" way. But the blue and white effect in these words here were done "INLINE", with the
<span>tag.This orange color is made by the
idglobal attribute just for testing the CSS#idSelector. It styles the element (in this case, the<p>paragraph) with the specified id.The HTML5 tag:
<p id="para1">The CSS3 selector (must be in the "internal" or "external" areas (see above) not "inline"):
     #para1 {
        color:rgb(224, 54, 2);
            }
For CSS selector reference check w3schools.
By the way, I check w3schools after almost ever lesson I watch. Its lightweight, clean, precise and it has a very objective "try yourself" button for every subject of each technology.
Maybe I'm overusing CSS. Sorry. I have to overpractice while I can.
I realize that my CSS is imperfect. For instance, image boxes are losing alignment when the screen zoom changes to more than 100%.
And this is only one of the mistakes. Again, I'm aware of them and will learn the right way when the lessons get to that point.